Pibcremental Tips & Tricks
Small habits that turn a cozy idle tree into a sky-climbing machine.
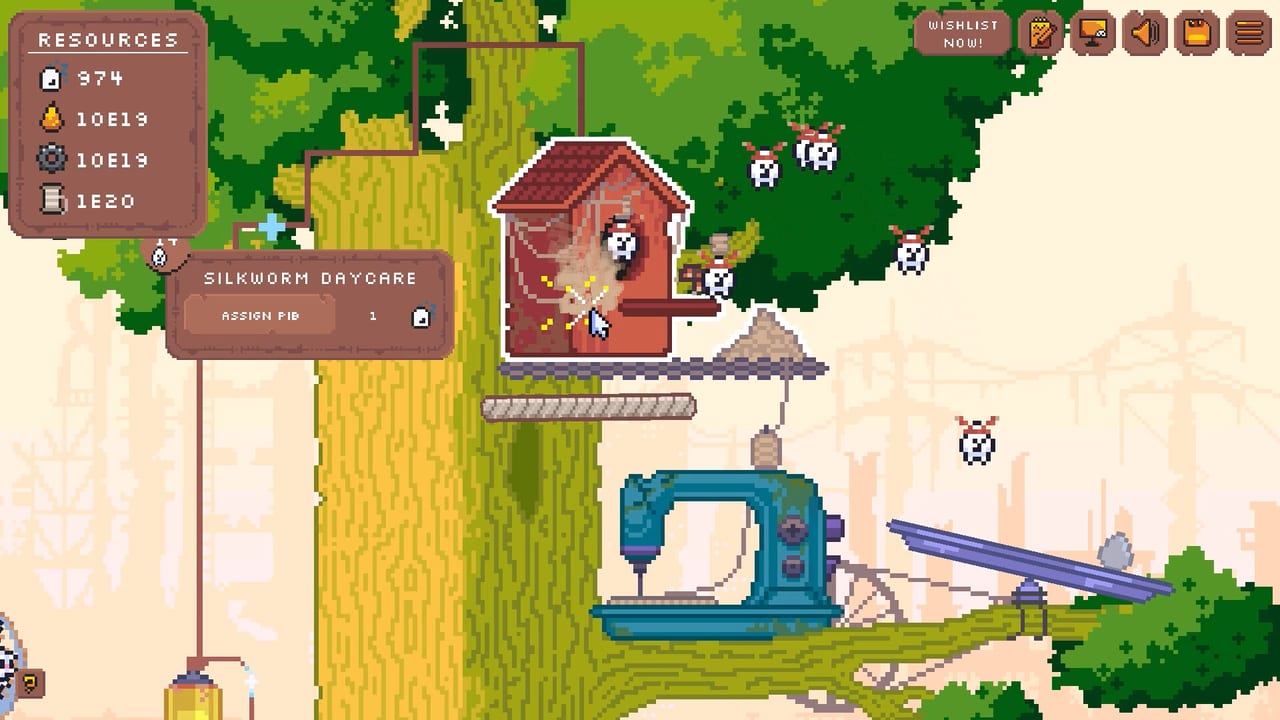
Once the opening loop clicks, Pibcremental rewards attention to tiny systems more than raw spam-clicking. This tips page gathers the mid-run habits that separate a stalled canopy from a clean climb: claim sap cycler pops, restaff after every tree grow, use click-versus-hold correctly, fix AFK staffing bottlenecks, time prestige, watch multiplier bars, trade at the Market, and stay awake for Digging, silkworm scratches, and Cool-Upgradium perks.
If you still need the first-hour walkthrough, start with Getting Started. Silk and costume tools get their own deep dive on Silk & Costumes. Event spikes live on Events & Relics, and reset math belongs in the Prestige Guide.
Never miss sap cycler pops
The sap cycler forms a bubble of condensed sap ore about every five minutes. Click the ore to break it and trigger a sap explosion. That burst often rivals minutes of steady assignment income in the early and mid game. Treat the cycler as a soft alarm:
- Glance at the tree after every upgrade purchase or hatch wave.
- Do not open a long menu binge with an unclaimed ore sitting ready.
- Spend explosion sap on a planned sink—click tech, a tree grow, or a bottleneck upgrade—not impulse buys.
- After prestige, relearn how valuable each pop feels under new permanent buffs; the click-to-break action stays mandatory.
Missing three pops in a row slows your next grow more than almost any other “I was busy reading tooltips” mistake.
Restaff after every tree grow
Growing the tree unlocks new quirky buildings. Leaving your old staffing chart in place is the classic softlock. Immediately after a grow:
- Identify which new building produces the resource your next bill demands.
- Move spare Pibs onto that structure until capacity or diminishing returns hit.
- Keep a skeleton crew on sap (and later scrap/silk) so side resources do not hit zero.
- Buy the cheapest upgrades on the new building before returning to vanity spends.
Cross-check staffing priorities against the buildings tier list and sketch spend order in the production planner when the canopy gets noisy.
Click versus hold on buildings
Early on, discrete clicks teach you which buildings respond. After prestige unlocks raise max click rates, holding the mouse on a building triggers more clicks and fills multiplier bars faster. Practical rule: tap while you are shopping menus and learning a new structure; hold when you are parked on a high-priority building and want the bar to climb. Hover-friendly structures you look at constantly deserve better upgrades than empty corners you never click.
Fix the AFK staffing bottleneck
Idle play only works if workers already have jobs. Before you step away:
- Hatch affordable Pibs and assign every idle worker.
- Fill the current bottleneck building first, then overflow into secondary resources.
- Claim any waiting sap cycler ore so the explosion is not sitting unclaimed for the whole AFK window.
- Avoid starting a Digging event or silkworm scratch window you cannot finish before you leave.
Coming back to a tree full of unassigned hatchlings is free income left on the table. Steam Cloud on this single-player title will keep the save—staffing discipline keeps the save efficient.
Do not prestige too early or too late
Too early: you reset before you understand resource sinks, with no plan for the next permanent buff, and often mid-event. Weak points buy weak nodes.
Too late: every upgrade costs an eternity, events are dry padding, and you are polishing cosmetics instead of banking a peak. Two shorter buffed runs usually beat one dead marathon.
Prestige when upgrades feel expensive and you know which adventure-tree node or permanent buff you will buy next. Finish active high-value events first. Details and templates live in the prestige guide.
Watch multiplier bars
Once multiplier bars unlock on buildings, raw resource totals stop being the only progress signal. Click or hold a building to fill its bar and raise efficiency. After a relic lands on a structure, that building’s bar becomes a staffing magnet—move Pibs there and feed the bar until the boost is fully used. Prestige nodes that amplify bar effects make this habit even more important on later runs.
Market trading tip (when unlocked)
The Pib Market lets you sell surplus sap, scrap, or silk for coins and buy the resource you are short on. Early tip: lower buy/sell fees when you can afford the Market upgrades, then sell the abundant currency to purchase the bottleneck. Do not liquidate the pile you need for an imminent tree grow. Market trades shine when one resource is overflowing while another blocks a bill—exactly the moment the production planner would flag a rebalance.
Digging event and silkworm scratch awareness
Digging events reward shovel uses and scrap-oriented payouts. Upgrades that add shovel uses or multiply Digging rewards are worth grabbing before the next mound appears; ignore them only if a tree bill is one purchase away. When Digging is active, pause long AFK stretches and resolve the interactions.
Silkworm wander/scratch mini-interactions fire between naps at the Daycare. Click and drag a wandering worm for a scratch reward. More Pibs assigned to silk make worms wander more often—so a skeleton silk crew is not only about silk income, it is about free scratch loot. Full costume and silk routing sits on Silk & Costumes; event framing sits on Events & Relics.
Cool-Upgradium perk awareness
Cool-Upgradium is a specialty currency tied to events and expeditions. Prestige-side unlocks that let you obtain Cool-Upgradium open game-changing upgrade menus. When those perks appear, treat them as high priority—do not burn the currency on a tiny local bonus if a transformative node is available. Track which events and expedition returns feed your Cool-Upgradium stock so you are not surprised mid-run.
Session checklist
Use this loop every active session:
- Claim sap cycler ore if ready (~5 minute cycle).
- Hatch and assign idle Pibs; restaff after any grow.
- Hold-click priority buildings to push multiplier bars.
- Resolve Digging, wishing star, or silkworm scratch prompts.
- Trade at the Market only to fix a true bottleneck.
- Spend Cool-Upgradium on the best available perk, not the first listed.
- Prestige only with a planned permanent buff and cleared events.
Cross-links
- Getting Started — first-hour habits these tips build on
- Silk & Costumes — Daycare, Parlor, stacking tools
- Events & Relics — Digging, wishing star, relic restaff
- Prestige Guide — reset timing and adventure tree
- Production Planner — spend and staffing decisions
- Buildings Tier List — what to staff first
Master these habits and the tree still gets chaotic—but the chaos starts working for you instead of against your next skyline.
Frequently Asked Questions
Quick answers about Pibcremental progression, prestige, and resources.
How often should I check the sap cycler?
About every five minutes it creates condensed sap ore. Click the ore for a sap explosion whenever you finish an upgrade, hatch wave, or short break.
When should I restaff my Pibs?
After every tree grow, after earning a relic that boosts a building, and whenever the next growth bill changes which resource is the bottleneck.
Should I prestige as soon as I can?
No. Prestige when upgrades feel too slow and you already know which permanent buff to buy—ideally after finishing Digging, wishing star, or other high-value events.
What is the Market useful for?
Once unlocked, sell surplus resources for coins and buy the currency blocking your next tree bill. Upgrade fees when you can, and never sell the pile you need for an imminent grow.
What is Cool-Upgradium?
A specialty currency from events and expeditions that unlocks powerful upgrades after the related prestige perk. Spend it on transformative nodes, not tiny local bonuses.